Acuity Scheduling
AcuityScheduling is online appointment scheduling software. The integration with CoachingCloud means you can use the Acuity widget within the One-to-One space allowing clients to book sessions with you.
if you don't already have an Acuity account you can sign up here:
https://acuityscheduling.com
1. Connect your Acuity account
In the Community Management area go to Settings>Integration and you'll see the Acuity integration as below:
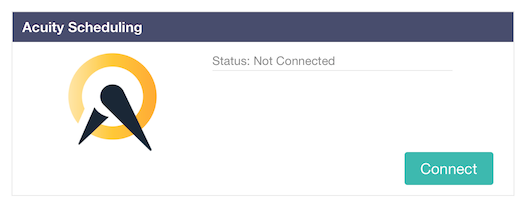
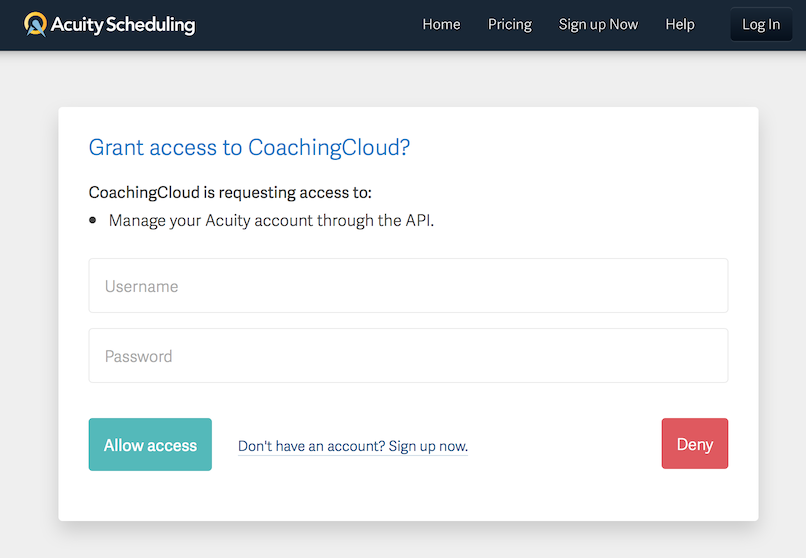
Click connect and it will ask you to enter your Acuity username (email address) and password to grant access to your Acuity account.
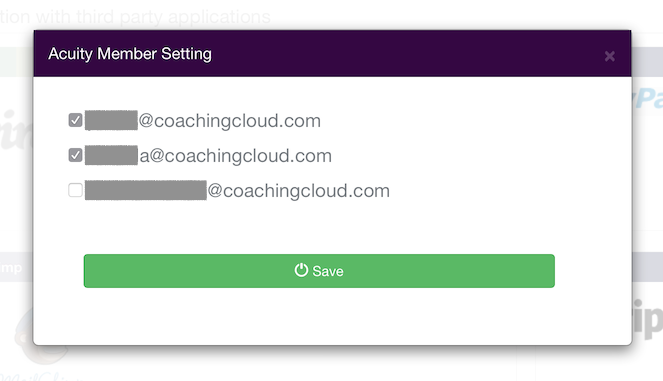
 Once your account is connected you will see two buttons: Members and Sessions
2. Select the members on your Acuity account whose calendars you want to add to CoachingCloud
This will allow their clients to book sessions with them within CoachingCloud. Click on the Members button and you'll see a list of everyone you've added to your Acuity account. If you are a solo coach or practitioner you'll just see yourself here, if you have a team of coaches / mentors in Acuity then you will see them all listed here. Tick next to the name of those you want to link to CoachingCloud.
NOTE: Before you move onto the next step you must have set up your appointment types in Acuity and completed point 8 below under Setting up your Acuity account.
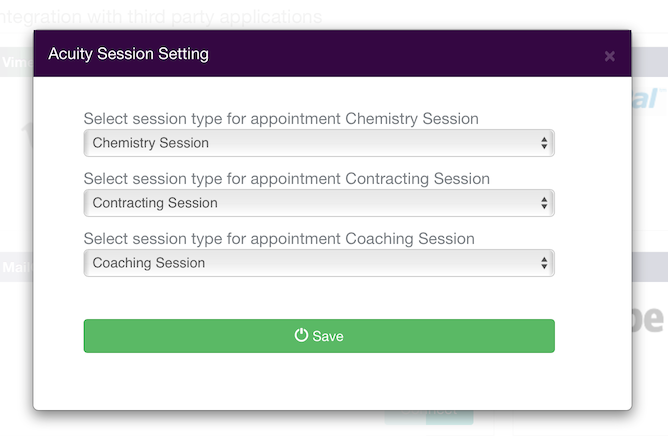
3. Link your Acuity appointment types to CoachingCloud session templates
Below each appointment type you have set up in Acuity you will see a dropdown box showing you all of the available session templates you have created in CoachingCloud. Select the template you wish to use for that appointment type, you can use one template for several types of appointment type if you wish.
Remember to make the session templates available to all programs that have access to that type of appointment! (see Session template access settings)
The integration only allows clients to book sessions, not to cancel and reschedule them. To save any confusion it's important to take these options off the notifications they receive and make it clear to your clients to contact you to cancel a session. They can of course book a new session straight into CoachingCloud. There are notes on how to do this in the section below.
Setting up your Acuity Account
Below are a few guidelines to help you when you're setting up your account. It's important to work through these as some are important to make the integration work and for a smooth client experience.
-
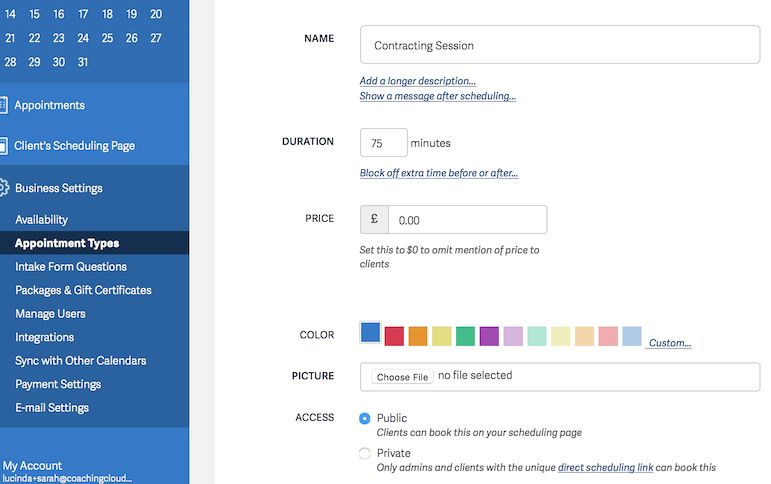
Creating your appointment types. You can set up appointment types to reflect your session templates in CoachingCloud. This will make it clearer when you are linking the appointment types with session templates. So if I have a session template in CoachingCloud called 'Contracting Session', I'm going to create an appointment type in Acuity called 'Contracting Session'.
-
Acuity bases the appointment type on the coach whereas in CoachingCloud the session templates that can be used depend on the program the Client is a member of. Take this into account when setting up your programs, a client will have access to all templates set up for their coach. If you charge different amounts for different types of appointments it may be best to hide the pricing from your clients.
-
Make sure you set your Appointments to Public so that clients can see them in CoachingCloud.
-
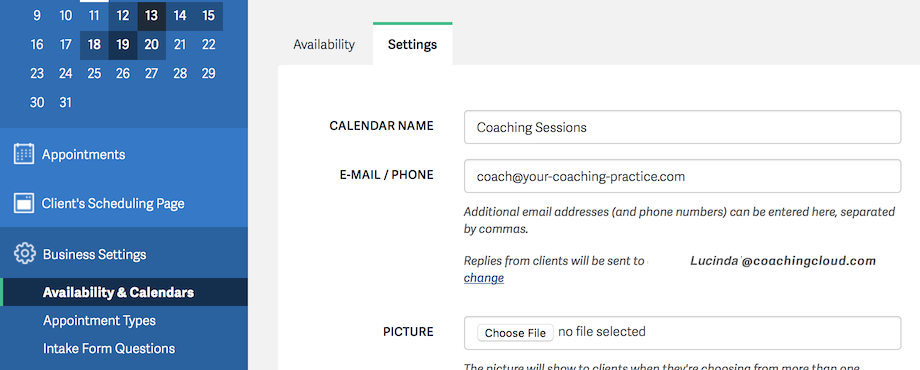
Make sure you set the calendar email address to the same one you use to login to CoachingCloud. We use this to connect to the coach account. Go to Availability & Calendars and click on the Settings edit button for the calendar to see the Settings page shown in the screenshot below.
-
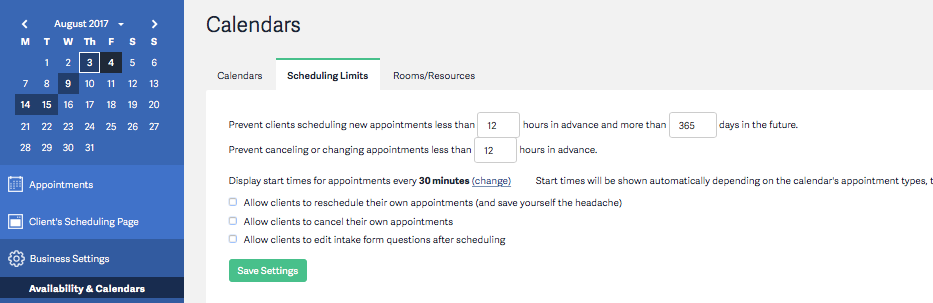
Remove the option for clients to cancel / reschedule sessions. These options do not work with the integration so make sure you remove them so they are not displayed to the client. Go to Availability & Calendars and click the Scheduling Limits tab. Uncheck the options as shown in the screenshot below.
-
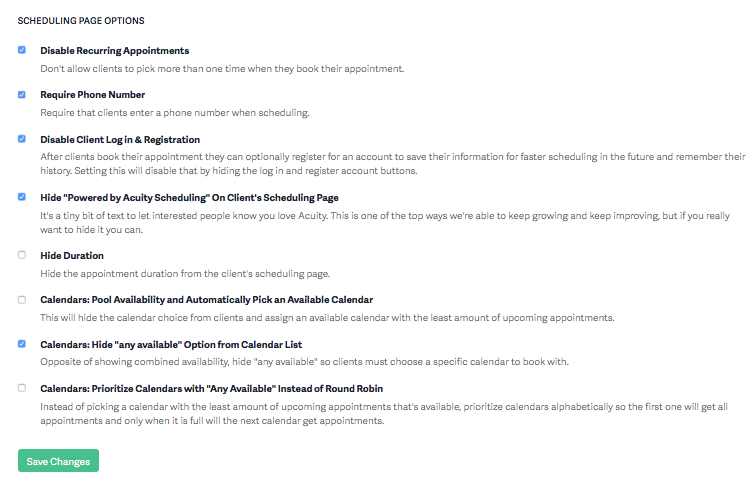
Edit the Client's Scheduling page settings. Select Client's Scheduling Page in the left menu and click Customize Appearance. Scroll down the page to 'Scheduling Page Options' and tick the options as shown in the screeshot below.
-
Set your Acuity Email settings. Remember that CoachingCloud sends out a session reminder to the coach/mentor and the client the day before the sessions and take this into account when setting the email reminders to go out from Acuity. You don't want to bombard clients with reminders as they become white noise that they'll just ignore.
-
Set up an Intake Form Question for the integration to work correctly. This is essential and MUST be done exactly as stated in these steps for Acuity to let us know the booking has been made. If you miss this step your Acuity bookings may not show correctly in CoachingCloud.
a. Go to Business Settings>Intake Form Questions and click the 'New Form' button.
b. Add the form name as cc_session
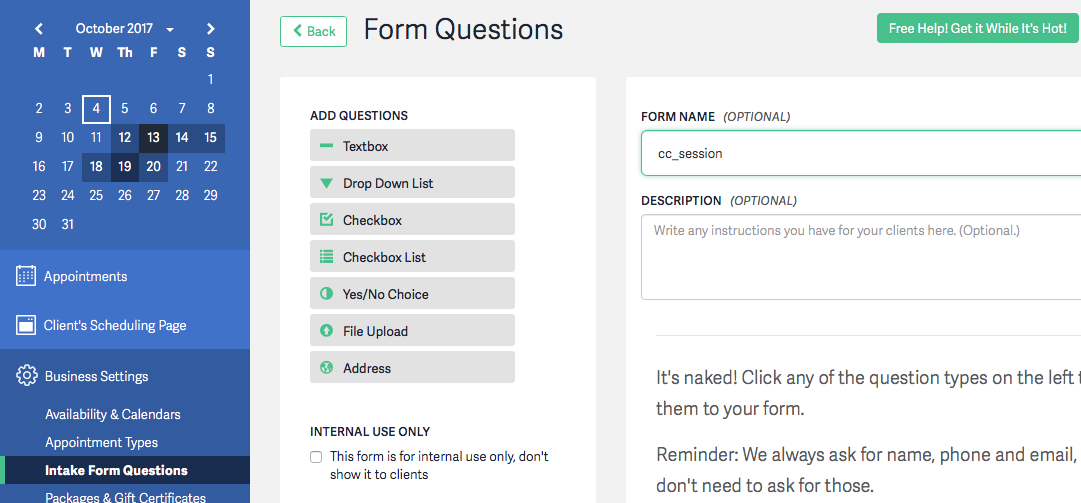
c. Under 'Add Questions' select 'Textbox'
d. In the Question box add guid and click the 'Add Textbox to Form' button.
e. Tick that the form is for internal use only so it isn't shown to clients.
f. Tick all of the Appointment types shown under 'Show this form when scehduling' so that it is used for booking all of your sessions.
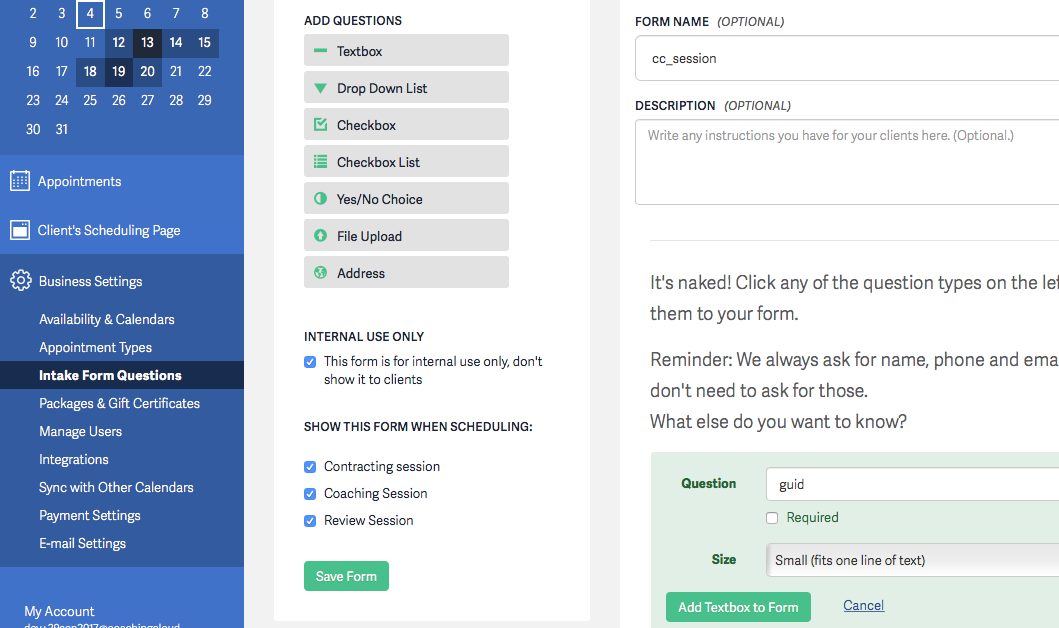
g. Save the Form and you are ready to set the Acuity Session Settings in CoachingCloud to complete your integration (Point 3 at the top of this screen: 'Link your Acuity appointment types to CoachingCloud session templates').